

The fastest way to run a project in Asana is to build a project around your actual workflow, break the work into action-first tasks with an owner and due date on each, group them into sections that mirror your real stages, and add automation only after the basics run smoothly. Optiostation calls this the “minimum viable structure” approach: less setup, more finished work. The steps below walk through exactly how to do it.
TL;DR:
- Building a project around actual workflow and action-first tasks helps avoid unnecessary setup and ensures quick progress.
- Use the appropriate view—list, board, timeline, or calendar—based on how your work moves and dependencies between tasks.
- Keep your project structure simple with clear titles, assigned roles, due dates, and minimal nested subtasks to maintain scanability.
- Delay automation and custom fields until you’ve used the project for a few weeks to prevent clutter and misalignment with actual work patterns.
- Archive completed projects promptly after a brief review, and manage permissions carefully to protect sensitive information and maintain team access.
Table of Contents
- How Do You Create Your First Project and Choose the Right View?
- How Should You Structure Tasks, Subtasks, and Sections?
- How Do You Visualize Schedules With Timeline and Dependencies?
- When Should You Add Custom Fields, Forms, and Rules?
- How Do You Collaborate and Keep Work Visible in Asana?
- What Best Practices Keep an Asana Workspace From Becoming a Mess?
- How Do You Close Out and Archive a Finished Project?
- What Mobile App Features Matter for Managing Projects on the Go?
- How Do You Onboard New Team Members to an Asana Project?
- How Do You Manage Permissions and Privacy on Asana Projects?
- Optiostation’s Perspective: Why Simple Wins for Students and Early Professionals
- Optiostation: A Mobile-First Companion for Lightweight Project Workflows
- Sources
How Do You Create Your First Project and Choose the Right View?
Start by deciding what actually deserves to be a project. A project is a coordinated effort with multiple tasks and, usually, more than one person involved. A single to-do that doesn’t need tracking over time is just a task. If that task has parts that depend on each other, break those into subtasks instead of spinning up a new project for a two-day errand.
Naming matters more than people think. “Marketing Website Redesign, Q1” tells you more at a glance than “Website Stuff.” Once you’ve built one solid project, save it as a template so the next similar project doesn’t start from a blank page.
For the view, match it to how the work actually moves:
- List view for flexible grouping and quick scanning of everything at once.
- Board view when tasks move through clear stages, like a kanban setup for a hiring pipeline.
- Timeline (Gantt-style) view for anything with real scheduling dependencies.
- Calendar view when the work is date-driven rather than stage-driven, like a content calendar.
You can switch views anytime without losing data. The most useful views for project management remain list, board, timeline, and calendar, and most projects end up using two of the four regularly.
How Should You Structure Tasks, Subtasks, and Sections?
An actionable task starts with a verb. “Draft client proposal” beats “Client proposal” because it tells the reader what needs to happen, not just the topic. Every task should carry an assignee, a due date, and a short description with enough context that someone could pick it up cold.
Here’s the basic anatomy of a task that actually gets done:
- Action-first title (“Send invoice” not “Invoice”).
- One assignee (never leave a task unassigned if it needs to happen).
- A due date, even a soft one.
- A short description with links, files, or context attached directly.
Subtasks work best for breaking a single task into two or three smaller steps that the same person handles in sequence. They’re not meant to replace real project structure. Community discussion on Asana’s own forum has flagged that going more than one layer deep into subtasks hurts scanability fast. If a task needs five subtasks and three of them belong to another team, that’s usually a sign the work should be multi-homed into a second project instead of buried in nested subtasks.
Sections can follow a stage pattern (To Do, In Progress, Done) or a stream pattern (Design, Content, Dev). Add milestones only at points that genuinely mark a handoff or a client-facing deadline, not every minor task.
Pro Tip: Name your sections after verbs or stages your team already uses out loud in meetings. If nobody says “In Review” in real conversation, don’t make it a section.
How Do You Visualize Schedules With Timeline and Dependencies?
Turning on Timeline view gives you a horizontal bar for every task, positioned against a calendar. Drag a bar to shift dates, or drag its edges to shorten or extend the work window. This is the fastest way to spot a pile of overlapping deadlines before they become a crisis.
Dependencies are what make Timeline actually useful instead of just decorative. Mark Task B as “waiting on” Task A, and Asana will flag it visually if A slips and threatens B’s start date. That single feature is often the difference between a project that quietly derails and one where someone catches the conflict early.
Quick pointers for scheduling:
- Set dependencies before you set exact dates, so the logic drives the calendar rather than the reverse.
- Use Calendar view for date-anchored work (content publishing, event planning) and Timeline for anything with sequencing.
- Reschedule from Timeline directly. Dragging one bar can cascade updates across dependent tasks automatically.
A practical guide to Asana’s project features notes that teams who set up dependencies early avoid most of the manual rescheduling that eats up planning time later.
When Should You Add Custom Fields, Forms, and Rules?
Custom fields turn a plain task list into something you can actually report on. The common ones worth adding are Priority, Status, and Estimated Hours or Effort. Each of these earns its place because it feeds a dashboard someone will actually look at.
Forms handle intake. A simple request form creates a task automatically and drops it into a “New requests” section, no manual copy-paste required. Pair that with a rule and you’ve built a mini triage system: a well-designed intake flow uses a form, a triage rule, and a saved filter that shows only untriaged work to whoever owns that queue.
Rules follow a simple pattern: trigger, condition, action. “When a task is moved to Done, assign it to the reviewer” is a rule. So is “When priority is set to High, add it to the leadership project.” Start with one or two rules, not ten.
- Add fields only if they’ll show up on a dashboard or report someone checks regularly.
- Build one rule at a time and watch it work for a week before adding another.
Pro Tip: If you can’t name who will look at a custom field’s data, don’t create the field yet.
Optiostation’s task management guide puts this plainly: start with the simplest structure that matches how your team actually works, then layer in fields and automation once there’s an established rhythm. Skipping that order is the single most common reason Asana setups become cluttered within a month.
How Do You Collaborate and Keep Work Visible in Asana?
@Mentioning someone in a comment pulls them into the conversation without reassigning the task, which matters because assignee and collaborator are different roles. The assignee owns the outcome. Collaborators just need visibility or occasional input.
Attach files directly to the task rather than burying them in a comment thread, and check the activity log when you need to know who changed a due date or reassigned something. It’s a built-in audit trail nobody has to maintain manually.
- Use @mentions for questions or requests for input, not general updates.
- Attach files to the task body, not scattered across ten comments.
- Post a short status update weekly (a few sentences: what shipped, what’s blocked, what’s next) instead of scheduling a status meeting.
That last habit alone tends to cut meeting time more than any tool feature does.
What Best Practices Keep an Asana Workspace From Becoming a Mess?
Most Asana workspaces don’t fail from too little structure. They fail from too much, added too fast.
- Match structure to real steps. If your team doesn’t actually work in five stages, don’t build five sections.
- Delay automation and custom fields. Give the team two or three weeks of actual use before adding rules. Community feedback consistently shows beginners over-build automation before they understand their own patterns.
- Reuse templates for repeatable work, and set recurring tasks for anything that happens weekly or monthly rather than recreating it by hand.
- Close projects promptly. A project sitting “90% done” for two months clutters everyone’s view and makes dashboards less trustworthy.
Pro Tip: If you haven’t touched a custom field’s data in three weeks, delete it. Unused fields are just noise on a dashboard.
How Do You Close Out and Archive a Finished Project?
Before archiving, run a five-minute retrospective: what worked, what didn’t, what you’d change next time. Drop those notes directly into the project’s description field so the next person who duplicates it as a template actually benefits.
Archive completed projects instead of leaving them active. It keeps the workspace navigable and stops old projects from cluttering search results or portfolio views. If the project had a solid structure, save it as a template before archiving so the next similar effort starts from something proven rather than a blank slate. Periodically check dashboards, too. Delete charts and fields nobody references anymore, or they’ll quietly erode trust in the data that’s left.
What Mobile App Features Matter for Managing Projects on the Go?
Most Asana use for students and early-career professionals often use the mobile app between classes, on a commute, or in short breaks, making it an important convenience feature.
The mobile app mirrors most desktop functionality, but a few features matter more once you’re away from a laptop. Quick-add lets you capture a task the second you think of it, before it gets lost in a group chat or a memory you won’t trust an hour later. Push notifications for @mentions and due dates keep you from having to check the app constantly just to stay current.
My Tasks view on mobile is where most people should actually live day to day. It pulls everything assigned to you across every project into one sorted list, which matters more than any single project view when you’re juggling coursework, a part-time job, and a club project simultaneously.
A few habits make mobile use smoother:
- Turn on due date reminders so tasks surface before they’re overdue, not after.
- Use the search bar with keywords rather than scrolling through a long project list.
- Comment from mobile when you’re blocked rather than waiting until you’re back at a laptop. A delayed comment often means a delayed teammate.
The tradeoff is real: building complex Timeline views or setting up new automation rules is clumsier on a small screen. Save that setup work for desktop, and treat mobile as your capture and check-in tool rather than your configuration tool. That division alone prevents a lot of frustration for people managing Asana primarily from a phone.
How Do You Onboard New Team Members to an Asana Project?
The biggest onboarding mistake is dropping someone into a project with zero context and letting them figure out the structure themselves. Give a new teammate five minutes of orientation before they touch anything: what the sections mean, which custom fields matter, and where the project overview and any pinned notes live.
Assign a starter task that’s low stakes but real. Something small enough that a mistake costs nothing, but real enough that they learn the actual mechanics of assigning, commenting, and marking complete.
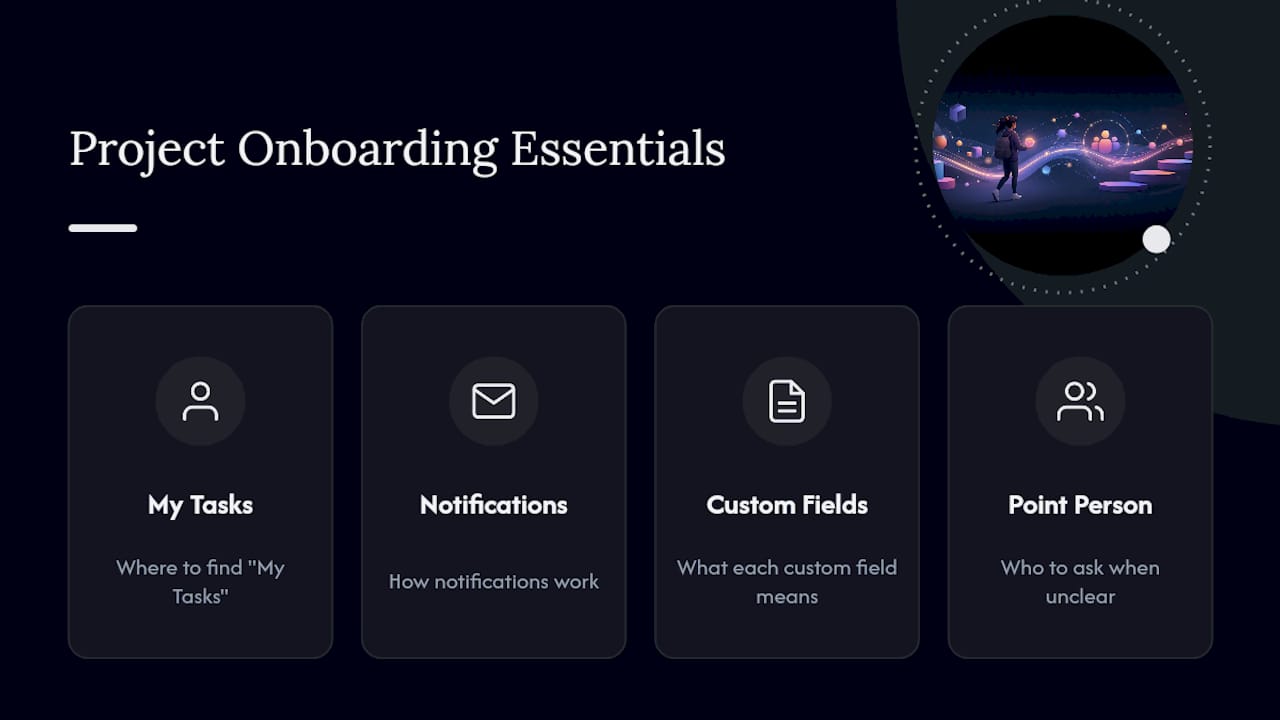
For teams that onboard people regularly, whether that’s a student organization rotating officers every semester or a small team hiring interns, a written onboarding checklist saved in the project description saves repeating the same explanation every time. Cover four things minimum: where to find “My Tasks,” how notifications work, what each custom field means, and who to ask when something’s unclear.
If your team wants structured lessons rather than ad-hoc explanations, Asana Academy offers guided courses that work well as a supplement, particularly for someone who prefers a formal walkthrough over learning by doing. It won’t replace a five-minute project-specific orientation, but it fills in the platform basics faster than trial and error.
For student groups specifically, this onboarding pattern applies just as well outside Asana. Teachers structuring group assignments face a similar challenge, and ideas for organizing classroom group projects offer a useful parallel for anyone managing rotating student teams.
How Do You Manage Permissions and Privacy on Asana Projects?
Every Asana project carries a privacy setting, and getting it wrong in either direction causes real problems. A project set to fully public inside your organization means anyone can find and view it, which is fine for a shared department calendar but risky for anything with sensitive client or personal information. A project locked down too tightly can quietly exclude a teammate who needed visibility and never got added.
Three roles matter here. Project owners can change settings, add or remove members, and restructure sections. Members can edit tasks and comment freely. Comment-only or limited-access members see the work but can’t restructure it, useful for a stakeholder who needs visibility without editing rights.
Practical rules worth following from week one:
- Set new projects to private by default if they involve personal grades, job applications, or anything not meant for a whole workspace to see.
- Add members individually rather than making a project public “just in case.” It’s easier to add someone later than to discover a sensitive project was visible to forty people the whole time.
- Review project membership periodically, especially in student groups or internship teams where people rotate out each semester.
- Use task-level “collaborators only” sparingly. It’s useful for one sensitive task inside an otherwise open project, not as a default habit.
Getting this right once at setup saves an awkward conversation later about who could see what.
Optiostation’s Perspective: Why Simple Wins for Students and Early Professionals
Complex setups don’t fail because they’re wrong. They fail because nobody maintains them once the semester gets busy. Lightweight patterns survive; elaborate ones get abandoned by week three. That’s why Optiostation’s task management guide leans hard into mobile-first, low-maintenance workflows built for people juggling classes, jobs, and group projects at once.
— Optiostation
Optiostation: A Mobile-First Companion for Lightweight Project Workflows
Asana handles multi-person projects well, but a lot of what fills a student’s or young professional’s day never needs a full project: personal deadlines, reading assignments, workout schedules, job application follow-ups. That’s the gap Optiostation was built to close. It brings the same core logic, action-first tasks, owners, due dates, and light structure, into a phone-first app designed around color-coded life areas instead of enterprise-style project trees.
Where Asana asks you to build a project, Optiostation lets you tag a task by life area (school, work, fitness, personal) and get smart reminders without setting up sections or rules first. It’s the difference between running a full project board and just needing your day organized before your 9 a.m. class. Read the complete guide to choosing task management software to see how the two approaches fit together, then download Optiostation and set up your first color-coded task list in under five minutes.
