

A home remodel project plan is a written document that says what work is being done, who is doing it, when it finishes and what it costs. The template below gives you eight sections to copy into any notes app, spreadsheet or task app, plus guidance on filling in each one so your kitchen, bath or whole-house project stays on schedule and on budget.
TL;DR
- A good remodel plan has eight parts: overview, scope, schedule, budget, materials log, decisions log, change log and punch list.
- Write the scope first, with in-scope and out-of-scope items, before you ask anyone for a quote.
- Track money in three columns (estimated, committed, actual) and give every task one owner.
- Most delays come from undecided layouts, slow permits and inspections, and late material orders, so plan around them from day one.
- Check permits with your local code official and verify any contractor’s licence and insurance before work starts.
Table of Contents
- What a remodel project plan actually does
- The template: eight sections to copy
- Step 1: Write the overview and set your goals
- Step 2: Define the scope in writing
- Step 3: Build the schedule from the scope
- Step 4: Set up the budget tracker
- Step 5: Keep a materials and purchasing log
- Step 6: Use a decisions log
- Step 7: Control changes with a change log
- Step 8: Track progress and close out
- Why remodels run late (and how the template prevents it)
- Check permits, licences and insurance before you rely on the plan
- Our perspective
- Run your remodel plan in Optio
- Prioritizing when the budget is tight
- FAQ
- Sources
What a remodel project plan actually does
A remodel plan turns a vague wish (“redo the kitchen”) into a list of decisions and tasks that people can be held to. It records the work, the person responsible and the finish date, which is how one Gantt-based planning guide describes it.
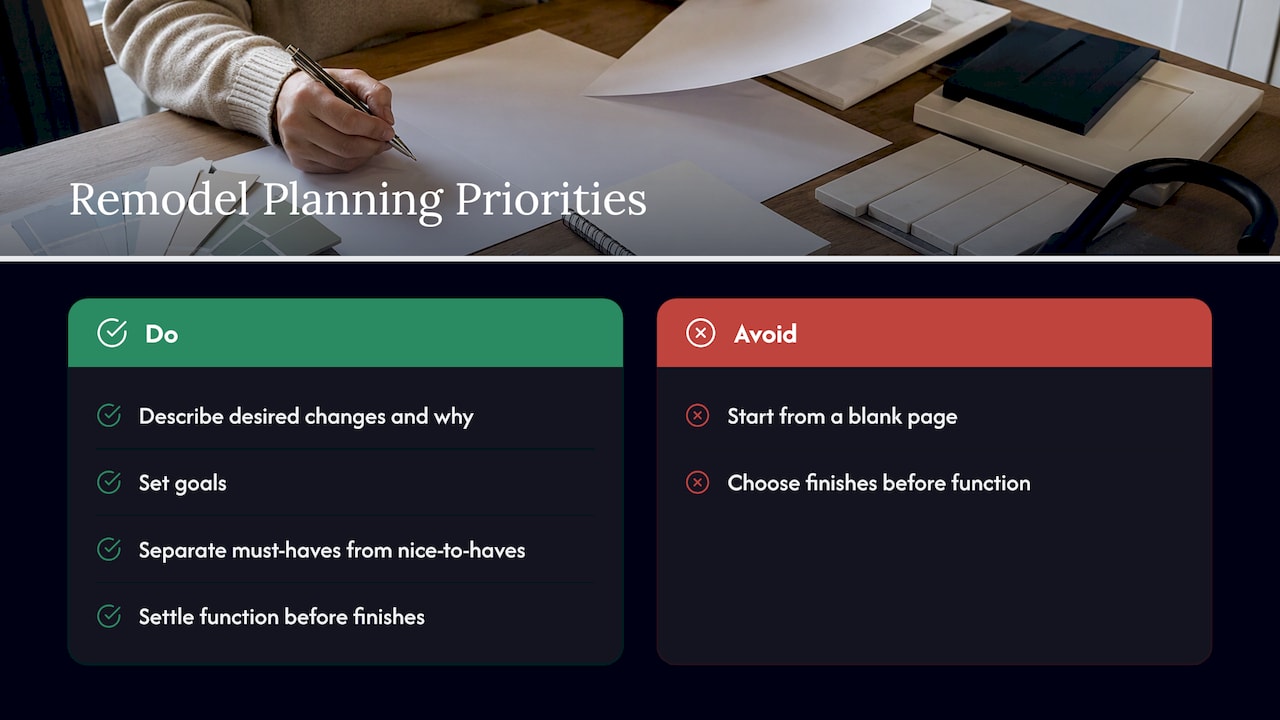
A template saves you from starting with a blank page, and it forces you to answer questions in the right order. You will notice quickly that finishes (paint colors, tile) are the fun part, while function (where the plumbing runs, how people move through the room) has to be settled first. The Canadian Home Builders’ Association advises homeowners to describe what they want to change and why, set goals, and separate must-haves from nice-to-haves. Its guidance also says priorities should reflect how the household will use each room: space, lighting, movement, comfort and convenience.
The template below is built on that idea. It captures outcomes first and products second.
The template: eight sections to copy
Paste this outline into whatever you use. Each section is explained further down.
| # | Section | What goes in it |
|---|---|---|
| 1 | Project overview | Room or area, reason for the remodel, goals, target finish, total budget ceiling, who decides |
| 2 | Scope of work | In-scope and out-of-scope items, drawings, product specs |
| 3 | Schedule | Phases, tasks, owner, duration in working days, predecessors, lead times, inspections |
| 4 | Budget tracker | Category, estimated, committed, actual, variance |
| 5 | Materials and purchasing log | Item, spec, quantity, supplier, order date, expected delivery, status |
| 6 | Decisions log | Open decisions, deadline for each, who decides, outcome |
| 7 | Change log | Requested change, cost impact, schedule impact, approved or declined |
| 8 | Punch list and closeout | Remaining fixes, inspection results, sign-off, warranty papers |
A reliable plan has these same bones whether you are redoing a powder room or gutting a floor. Only the number of rows changes.
Step 1: Write the overview and set your goals
Keep this to half a page. Fill in:
- The problem. “Kitchen has too little counter space and poor lighting” is better than “update kitchen.”
- Goals, ranked. Three to five, in priority order. Example: more storage, a working dishwasher location, brighter lighting, then new finishes.
- Must-haves versus nice-to-haves. Mark each. When quotes arrive higher than expected, this list tells you what to cut without arguing.
- Budget ceiling and target finish. Treat these as limits, not predictions.
- Decision makers. If two people share the house, name who has the final say per category. Late disagreements stall jobs.
If you are juggling this alongside classes or a full-time job, put the ranked goals where you will see them often. In Optio, for example, you can color-code life aspects so “Home” tasks stay visibly separate from work or study.
Step 2: Define the scope in writing
The scope is the most important page in the plan. It is the list of what will and will not be done. Professional contracting guidance from the Canadian Home Builders’ Association says a detailed written scope should cover demolition, salvage, structural work, windows and doors, mechanical and finishing work, waste disposal and work done by others. It should come with drawings and product specifications such as brand, model, quantities, dimensions and color.
That guide is written for Canadian renovators, but the principle travels: remove interpretation. If a sentence in your scope can be read two ways, someone will read it the way that costs you more.
A simple scope block looks like this:
In scope
- Demolish existing cabinets and countertops; haul away debris
- Relocate sink supply lines
- Install new base and wall cabinets (model and finish listed)
- Install quartz countertop (supplier, thickness, edge profile)
- Paint walls and ceiling (brand, color code)
Out of scope
- Flooring (handled in a separate project)
- Appliance purchase (owner supplies; installer connects)
- Any structural change to the load-bearing wall
Work by others
- Electrician to run a new circuit for the oven, arranged by the general contractor
The out-of-scope list prevents the “I thought that was included” conversation. If you want more examples of how to word these sections, our project scope example and scope management plan template walk through the structure.
Step 3: Build the schedule from the scope
Start from the scope, not from a calendar. A workable method:
- Turn each line of work into one or more tasks.
- Group tasks into phases.
- Assign one trade or person to each task.
- Estimate duration in working days, not calendar days.
- Link predecessors, meaning what must finish before a task can start.
- Add lead times and inspections as tasks of their own.
- Set planned dates, then update them whenever something moves.
This follows the sequence described in a construction scheduling template guide, which emphasizes that dependencies, not just dates, make a schedule useful.
A typical phase order to adapt
Remodels vary, so treat this as a starting point rather than a script:
- Pre-construction, selections and permits
- Ordering long-lead items (cabinets, windows, special tile)
- Protection of the home and demolition
- Framing or structural changes
- Plumbing, electrical and HVAC rough-ins
- Rough inspection
- Insulation and drywall
- Waterproofing where needed
- Flooring, cabinets, counters, tile and paint
- Trim and fixtures
- Final inspection
- Punch list, cleaning and final walkthrough
A 2026 remodeling schedule from a U.S. printable schedule guide lists a similar order and includes waiting time for inspections and shop lead times. Do the same. A task called “Wait for rough inspection” feels silly until the day it holds up your drywall crew.
A sample schedule block
| Task | Owner | Days | Starts after | Notes |
|---|---|---|---|---|
| Finalize cabinet order | You | 3 | Layout approved | Lead time: confirm with supplier |
| Submit permit application | Contractor | 2 | Drawings done | Wait time set by local office |
| Demolition | Contractor | 2 | Permit issued | Protect floors and doorways |
| Rough plumbing and electrical | Trades | 4 | Demolition | Inspection follows |
| Rough inspection | Local inspector | 1 | Rough-ins | Book in advance |
| Drywall and paint | Contractor | 6 | Inspection passed | Includes drying time |
| Cabinet install | Installer | 3 | Cabinets delivered, paint done | Check delivery first |
If you are someone who plans in a task app rather than a spreadsheet, the same logic applies: one task per row, one owner, one due date, and reminders on the tasks that depend on outside parties. For a deeper look at timelines in Gantt form, see our guides to a project management Gantt chart template and a schedule management plan template.
Step 4: Set up the budget tracker
Use three columns for every budget line:
- Estimated: your pre-quote number
- Committed: what you have signed for
- Actual: what you have paid
The gap between columns shows you trouble early. If committed is already above estimated before demolition begins, you know to trim scope while it is still cheap to do so. Review the tracker weekly, not at the end.
Suggested budget rows:
- Labor
- Materials
- Fixtures and appliances
- Permits and inspections
- Disposal and dumpster
- Contingency
- Total
Always include the contingency line, and treat it as spoken for only when a real surprise (hidden damage, a code upgrade) appears. Do not use it to upgrade your countertops.
Payment timing belongs in the budget too. Contractor Cameron Figgins, quoted by Bob Vila, suggests tying payments to physical progress when you are unsure how long the work will take. Put payment milestones in the tracker next to the phase they correspond to.
Step 5: Keep a materials and purchasing log
Materials are where schedules slip quietly. A cabinet that arrives four weeks late is just as damaging as a contractor who does not show up.
For each item, record:
- Description and specification (brand, model, finish, dimensions)
- Quantity
- Supplier and quote
- Order date and expected delivery date
- Payment status
- Storage or delivery location
- Installation status
- Who is responsible for checking it arrived and is correct
This single log prevents duplicate purchases, missed delivery windows and the awkward discovery that the vanity is the wrong size after the plumber has left. Set a reminder on each expected delivery date and a second one a few days earlier to call the supplier.
Step 6: Use a decisions log
Many remodel delays are decisions that nobody made in time. For each open decision, write down the question, who decides, and the date by which it must be settled for the schedule to hold. Typical entries: faucet model, tile layout, light fixture positions, paint colors.
Tie each decision deadline to the earliest task it affects. If the tile choice must be made by the 12th so the order arrives before setting day, put that deadline on the 12th, not on the day you need the tile.
Step 7: Control changes with a change log
Every remodel produces “while we’re at it” ideas. The fix is a change log. Before approving anything, write down:
- What changes
- Cost impact
- Schedule impact
- Who approved it and when
Approve nothing verbally. A small change (moving an outlet) can cascade into extra inspection time or a re-ordered product. Writing the impact down makes the real price visible before you agree to it.
Step 8: Track progress and close out
Progress tracking does not need to be elaborate. A weekly check-in against the schedule, a short list of what slipped and why, and a running punch list cover most home projects. Each phase in your tracker should show the responsible trade, its dependency, planned and actual dates, any slippage and who signed off completion.
At closeout, record:
- Contractor assignments and final costs
- Permit status and inspection results
- Change orders and payment milestones
- Warranty information and manuals
Keep these in one folder, digital or paper. You will want them when you sell the house or call about a warranty.
Why remodels run late (and how the template prevents it)
Contractors interviewed by Bob Vila cite a consistent set of causes: work starting before layouts and technical decisions are confirmed, permit and inspection delays, and late material orders. When decisions are still pending mid-construction, work may pause to avoid mistakes, wasted labor and budget overruns.
Here is how each cause maps to the template:
| Common cause | Where the template addresses it |
|---|---|
| Layout not settled before demolition | Scope (Step 2) and decisions log (Step 6) |
| Permit and inspection waits | Schedule tasks with explicit wait time (Step 3) |
| Late material orders | Purchasing log with delivery dates (Step 5) |
| Scope creep | Change log (Step 7) |
| Budget surprises | Three-column tracker with contingency (Step 4) |
One more pattern: starting with finishes instead of function. Lock the layout, plumbing locations and lighting plan before you fall in love with a tile.
Check permits, licences and insurance before you rely on the plan
A plan is only as good as the approvals behind it. Before you finalize dates:
- Ask your local code official which permits your work needs. Rules differ by city and county, and your plan’s schedule should include the permit wait.
- Verify the contractor’s licence with the authority that issued it.
- Ask about their experience with local permits and code requirements.
- Request proof of general-liability insurance.
- Ask who will coordinate the required inspections.
These questions come from FEMA’s contractor checklist, a U.S. government document. Add the answers to your overview page so everything lives in one place.
Our perspective
We built Optio for students and young professionals who are already running three or four lives at once: classes or a job, a team project, a side goal and, sometimes, a first apartment that needs work. A remodel plan is just another project, and the same habits make it manageable.
Our view is that the best plan is the one you actually open. A forty-tab spreadsheet that gets updated once is worse than a short list with clear owners and reminders. That is why Optio centers on simplicity and flexibility: you break a project into tasks, give each a deadline and a reminder, organize them by project, and color-code the parts of your life so the remodel does not swallow everything else.
We are an indie-built app and we shape it with feedback from our community of Centurions. If you plan a remodel the way you would plan any serious project, with a clear scope, a sequence and one owner per task, you will make fewer expensive mistakes.
Optiostation
Run your remodel plan in Optio
If you would rather keep the plan on your phone than in a spreadsheet, Optio is a mobile app for task, team and time management. You can turn each remodel phase into a project, add tasks with due dates, set smart reminders for deliveries and inspections, track time, and sync deadlines with Google Calendar. Hashtag-based search helps you find the tile quote or the permit task later. Core features are free, with advanced capabilities planned behind a paid subscription. You can start from the Optio home page.
If you want a quick structure for any project first, try our five-minute project planning template, then adapt it using the eight sections above. For a worked example of a construction-style plan, see our sample construction project planning and scheduling plan.
Prioritizing when the budget is tight
Every remodel reaches the moment when quotes exceed the budget. Your must-have and nice-to-have list from Step 1 pays off here. Sort remaining items into three groups: work that affects safety or function (do it), work that protects what you have already paid for (do it in the right order), and work that is purely cosmetic (defer it).
Deferred items should not disappear. Put them in a “Phase 2” list with rough costs so you can come back to them. Our guide to prioritization techniques covers ways to rank competing tasks if you want a method beyond gut feeling.
FAQ
What should a home remodel project plan template include?
At minimum: a project overview, a written scope with in-scope and out-of-scope items, a task schedule with dependencies, a budget tracker with estimated, committed and actual columns, a materials log, a decisions log and a change log. Add a punch list for closeout.
How far ahead should I plan a remodel?
Start with the scope and selections before you request quotes, since lead times for cabinets, windows and special materials can set your real start date. Permit and inspection waits also vary by location, so ask your local code official early and build that wait into the schedule.
Can I use a spreadsheet instead of a Gantt chart?
Yes. A Gantt chart makes sequence and overlaps easier to see, but a table with task, owner, duration, predecessor and dates holds the same information. Choose whichever you will keep updated each week. Our Gantt chart template guide explains the options.
How do I stop a remodel from going over budget?
Track three numbers per line (estimated, committed, actual), review them weekly, keep a contingency line, and approve every change in writing after noting its cost and schedule impact. Settling layout and product choices before demolition removes many of the surprises.
Who should check permits and licences?
You should confirm permit requirements with your local code official and verify any contractor’s licence with the authority that issued it. Request proof of general-liability insurance, and ask who will coordinate inspections, as in the FEMA checklist above.
Sources
- Canadian Home Builders’ Association: Before Starting a Renovation
- Canadian Home Builders’ Association: Residential Renovation Contracts guide (2018)
- FEMA: Checklist of Questions to Ask Your General Contractor
- Bob Vila: General Contractors Say These Are the Top Reasons a Renovation Is Delayed
- Remodeling schedule template guide (2026)
- Construction schedule template guide (2026)
- Home renovation project plan template with Gantt chart
